The Hidden Costs of Tiny House Construction

People are continually surprised by how much tiny houses cost. Fact is there is everything in them that is in the much larger counterpart, the only thing lacking is all the extra space. In a lot of cases it even requires more compact appliances and equipment. That stuff isn’t ‘standard’ nor mass produced. They are often more expensive as well. Then there are just those things that you don’t think of if you’ve never built a house before… That is what I want to talk about. These are my top most surprising costs…
Fasteners/Nails
I easily spent $700-$900 on nails/screws/lag bolts/liquid nails and other fasteners. When you are accounting for costs in your tiny house it’s easy to just account for the ‘big things’ like studs and sheathing but all of that stuff needs to be put together too. Those fasteners are easy to miss.
Metal Ties
Hurricane ties and strapping are necessary in a tiny house, they just are, you are building a tiny house that basically has to withstand hurricane winds while driving down the freeway and earthquake type of shock when being moved. You need to account for that or your hard work is all a waste. at $3-$7 bucks a pop and needing them on both ends of every rafter and other locations adds up. I have a few hundred dollars in metal ties in my house (which need fasteners!)
Tool Maintenance/Blades/Bits
Far more mishaps happen with dull blades than sharp ones. Keep your blades sharp. Use the right blade for the job. Dont use a wood blade to cut concrete backer board and rigid insulation… Use a sharp blade designed for what it is you’re cutting. Some blades last longer than others, I think I went through at least eight wood blades (maybe more) on my build, a masonry blade, two tile blades and about eight double sided planer blades. Some of those blades we in excess of 50 bucks! I spent over $400 on blades alone.
Caulk
no matter the project and the construction type you will use more caulk then you anticipate. I started with 4 tubes foolishly thinking that that would be ‘oodles’. More than 2 ‘contractors packs’ later I had learned my lesson, buy in bulk! 🙂 I probably spent at least a hundred bucks on caulk. (it covers mistakes pretty well, I made a lot of those!)
Trailer Prep
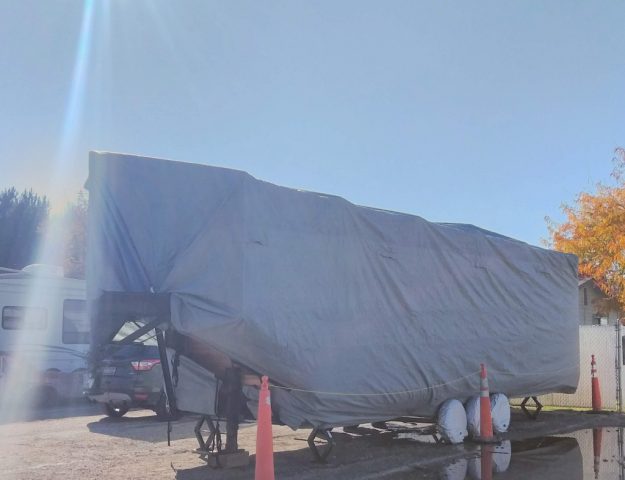
If you buy a used trailer you may find a heck of a deal! You may also put enough money back into it to kick yourself for not buying a new one built FOR tiny houses. In the end I still found a great deal with my trailer but there was A LOT of elbow grease put in. And cash! I paid an extra $270 for hardware to add and relocate the axles. An extra $300+ for steel to build out the frame to accommodate my design . An additional $450 for new tires. That is more than a thousand bucks I put into readying the used trailer.
Paint
I knew I had to paint my walls. I foolishly thought a gallon would do. Nope. To avoid buying the big 5 gallon jug of paint I thought three more gallons would do. Nope. I ended up using just over six gallons of paint on my walls. I used a middle grade paint. It was over 20 dollars a gallon. My budget went from about 20 bucks to a hundred+ fast. I could have saved money AND labor had I just gone with a higher quality paint + primer to begin with. I believe, after millwork and walls, I have over ten gallons of paint in my wee house. Probably would have been half that with better paint. Over 200 bucks of my budget went to paint, just on the inside. That doesn’t count the stain and sealer I used outside! Plan heavy for that if you’re painting/sealing.
Shop Space
If you don’t have space or know a friend/family member with a place to work that is going to cost something. And it comes with a liability, should you get hurt you’d have cause for a lawsuit. For this reason, if you rent a space the owner will likely have to carry some sort of insurance. They will pass that rate along to you. On the plus side, paying to use a space gives you incentive to get out there as often as possible. You are incentivized to not doddle. You may just get into your new tiny home quicker than if you didn’t have a shop fee to pay!
And if you’re buying…
Labor
If you have to hire anything done count on spending some bucks. Labor is expensive. A good rule of thumb is that labor is equal to the cost of materials. NOT reclaimed materials. You don’t get to use that here. Equal to the cost of new building materials. If you need siding done, price siding and then double it. Price plumbing and all the fixtures then double it. It adds up fast! This is primarily why I believe tiny houses are DIY movement. A house you could build for $25,000 of materials (believe me, that is EASY to hit if you’re not super careful and organized) would easily cost $50,000 to have built. There is A LOT of work that goes into a house. It’s not rocket science type labor. Nothing is terribly difficult about building. Even for the best professional it takes time! Last I checked time is not free…


All true said one diyer to another!
🙂
Very Valuable Advice! Thanks, so much!
Glad you like it!
I’m glad you posted this. My husband and I have been thinking of building a tiny house, and it’s good to know about those little costs that add up pretty fast. It also makes me think long and hard about the trailer issue. Thanks for the info!
Glad you like it Tami!
This is my favorite post to date. There is a lot of sensationalism and news about personal builds for 12,000 or less, and I think that can be misleading on true costs.
I really appreciate this post in illuminating
The reality of what it costs to build a tiny house. 🙂
Ha, that’s kind of funny because I think my house might be helping lead that sensationalism, I built mine for under $12,000 and it has been noted several times, I did it with lots of elbow grease and footwork tracking down cheap/free materials, I wrote a post here, http://minimotives.com/2013/01/30/sponsorships-a-how-to/ about how to do the same but you’re either exchanging dollars or hours, at some point one is more important than the other!
So true thank you for the link. 🙂
Great post!
I love your note about paint, because IMO it’s something that everyone with a big or tiny house will eventually learn: you get what you pay for.
When we bought our house, we decided to cut costs by buying the cheaper stuff. Sure our walls looked fabulous for awhile, but on year three, the stuff started to *peel.* This may not be a problem for people who love to paint and re-paint every so often, but I hated painting with a passion and told my other half that I will for now on “outsource.” So that ended up being another expenditure on top of everything else breaking down in the house, because, you know, when you have your own house, you own all the problems with it too. So yes! Don’t be a cheapskate, splurge on good quality paint; your sore shoulders and neck will thank you for it later.
I will only buy good paint from here on out! It does make a big difference!
We have spent *at least* $500 on Gatorade.
This might not be an issue in Idaho, but for a build in South Texas? Yep. No choice.
LOL. That’s awesome!
In building inexpensively, there are so many hidden cost. Gas can really add up if you are running around trying to find materials non traditionally.
Also support both from family members… donating labor, time, and having or giving access to tools. I would love to have used Pallets, but did not have a way to plane the repurposed wood and time was a factor for me. We each have different levels resources to draw on. That being said
I have learned through building, how I might be more efficient with costs
In the future while maintaing the build quality I desire. There is always more to learn.
Let me add Macy, I believe the design and build you accomplished to be genius.
And I have been in awe since the first day I saw it. You are truly at the top of your class.
Well jeeze, thank you! Thats nice to hear!
I agree Jason. And that brings up another expense, professional design.
Great point! GAS is a good one, I did drive all over timbuktu! There are definitely things I could do so much better and faster the second time around!
Hahaha, I definitely had a beer budget… 🙂
Hi, Macy, good post. I don’t think you missed anything vital. Sure – you can spend/save more depending on specific products (teak vs. pine, for example), but there are some costs that are nearly unavoidable.
Depending on your area, check out the ReStore/Habitat For Humanity stores. Most of my nails, screws, bolts and metal straps, etc, have come from one of the many in my area. I started haunting them a couple years before I even bought my trailer, several times a week. It paid off, big time. Gas costs weren’t bad, due to using my scooter and borrowing a car with good fuel economy. I’ve compared my costs to the big box stores, and have been saving an average of 80%. Hard to believe, right? I have the receipts to show it! And I only use hot dip galvanized stuff, too.
I went the same route with paints, stains, caulks, and all that sort of thing. It’s true, you WILL use much more than you anticipate! MUCH more…. plus you have to be sure to buy products appropriate for the job at hand.
Tools, now, are a different story. Except for looking for the very best price, I spend a lot of money on this category. I agree with you Macy, you buy junk and you will regret it. I’ve wasted $$ on poorly made blades trying to cheap out, and had to go repurchase better stuff right away. Very annoying.
I went the used trailer route, and am unsure yet if that was a good choice or not…we’ll see after the costs of replacing tires and having someone go over the brake lines, etc. It might have been a bad idea. There is peace of mind in buying a new, purpose-built trailer that you KNOW will be able to handle the weight safely.
Wow, TLDR, right? LOL
Parker
All good points! The one money saving tip I learned and used with tools (the ones my dad didn’t already have), find them on craigslist, use them and then sell them on craigslist. I believe I actually profited a little from buying and then selling them :). The blades and parts though, you can’t skimp on! Medical bills are a lot more expensive than using the right tool for the job! (I had to google TLDR 🙂
Sweet tip on the Craig’s list angle. Very smart.
Hi Macy,
It’s soooo good to see someone being honest, that has actually been through this. There’s not many of us out here that understand the true costs of a Tiny or home building in general. I have about 18K in our 520SF Small on posts (no trailer), but since I was already in the building trades, I didn’t need to spend 15K on my tools. This doesn’t include the 1300 hours of labor either. You are correct too about doubling material costs for labor, but that may be on the extremely low side, depending on how fancy/schmancy you get with what you are doing with those great, cheap material finds, LOL! When it’s all added up, we have our house insured for just over 100K for replacement cost, as it is built! Our land costs are not included.
Ron
I can’t get electricity hooked up by Duke Power without a County permit and they won’t give me a permit stating my house is safe for electric hookup. What hidden expense resolves that issue??
I believe that would fall in the ‘moving’ category! 🙂 Some places are just dead set against utility hookups without a foundation structure… :/
If I can title and register the house as an RV my problem is solved. Maybe an RVAI certified electrician? Maybe I can get them to do an electrical inspection.
That generally needs to go through the department of transportation and is an easy process here in Idaho, I’d call them up and ask what you need to do to register as an RV? Ours doesnt require an inspection, RVIA or not.
Shoot! County does not allow RV living on my own land. So… no RV, no motorhome, no park model RV mobile home, only modular and stick-built on the ground and inspected allowed.
OMG!!!! Don’t even get me started on the cost of nails, screws and all the metal straps!!!!
Just buy in bulk from the get-go! The biggest boxes they sell, and you’ll STILL NEED MORE!
A tip on priming / painting drywall:
This is how you seal NEW drywall and guarantee a great paint finish using the basic $20ish per gallon Behr paint afterwards (interior – don’t bother with the expensive paint if you have properly sealed and primed your walls; exterior the good stuff is DEFINITELY WORTH IT!)
First, you must buy TWO different ZINSSER Primers – just buy the 5 gallon buckets of each (TRUST ME – it is WAY CHEAPER!)
sealer: Zinsser Primecoat 2
primer: Zinsser 123 Primer
The First thing you do on new sanded smooth drywall is CLEAN THE DUST OFF with a barely damp rag. Let it dry overnight.
The next day, you use Zinsser PRIMECOAT 2 Waterbase Primer / Sealer. THIS IS VERY IMPORTANT! This SEALS THE PAPER FACING! It is a clay-based sealer and the PAPER SUCKS UP SEALER – any sealer – like there is no tomorrow. Using this will allow the next finish primer to go on smoother and you will use less of it. Primecoat seals the paper, but you need TWO COATS! It dries really fast though, so you should be able to re-coat the first wall by the time you finish all the walls with the first coat.
This is the cheapest sealer (approx $65 for 5 gallons), but it is NO GOOD AS A PAINT BASE! Paint will not properly adhere to this, and it will be splotchy. Plus, it is very soft and scratches easily. That is why the next step is very important:
The next day, after the sealer is fully cured, you will use Zinsser 123 latex primer (approx $90 for 5 gallons), 2 coats, 2 hours dry between.
Then the walls will be ready for any latex paint (including the $20 basic Behr), to go on smoothly and adhere well.
If you want to paint wood, that is totally different. For solid wood, apply a few THIN coats of Zinsser BIN shellac based sealer (use denatured alcohol to clean brush). This will prevent any yellow streaking and seal dark knots (for knots, apply a few coats over the knots, then 2 thin coats over the entire surface. Allow last coat to dry a few hours.
Then, use 2 coats of Zinsser Covercoat fast-dry Alkyd Primer (this is oil-based, so use Mineral Spirits, Turpentine or paint thinner to clean brushes – don’t use the “green” stuff – it ruins the primer and paint), 6 hours between coats (longer if it is really humid or really cold).
Then, if using an oil-based enamel or a SOLID stain made to go over an Alkyd primer, you can just paint or stain.
But, if using a latex paint, give it a coat of Zinsser 123 after the Alkyd Covercoat dries, and let dry 2-3 hours (the Alkyd primer seals the wood, but latex paint adheres best to the latex 123), then paint. Use water to clean-up latex.
Tip: If you are using a dark or saturated paint, GET THE LAST COAT OF PRIMER TINTED TO MATCH!!!! Seriously, I once tried to paint a wall red without tinting the primer, and after 5 coats it was still streaking. I got a gallon of primer tinted pink, and boom – it took one coat of paint, but I added a second to cover the roller / brush marks.
I use red (pink) tint under red, and burgundy (purple) under burgundy. I use grey tint under anything blue or green or grey (even under light sky blue – I get the primer tinted light grey and then the true color of the finish paint comes out). I use brown under browns, copper and mustard. The only colors I don’t tint before painting is white, cream or pale yellow. Under aqua I get it tinted to match.
Tinting is free!
If you use a solid stain on wood siding, you MUST get the Alkyd primer stained to match perfectly, since the stain is more of a protectant, and not very opaque.
Wow, I knew nothing about paint! To Macy and all the comments here, thanks for sharing hidden costs and appropriate estimates. I will likely have to pay to have a tiny home built, but I don’t want to be ignorant of the process.