
Update – Electrical, Plumbing, Interior Walls
Another productive weekend!
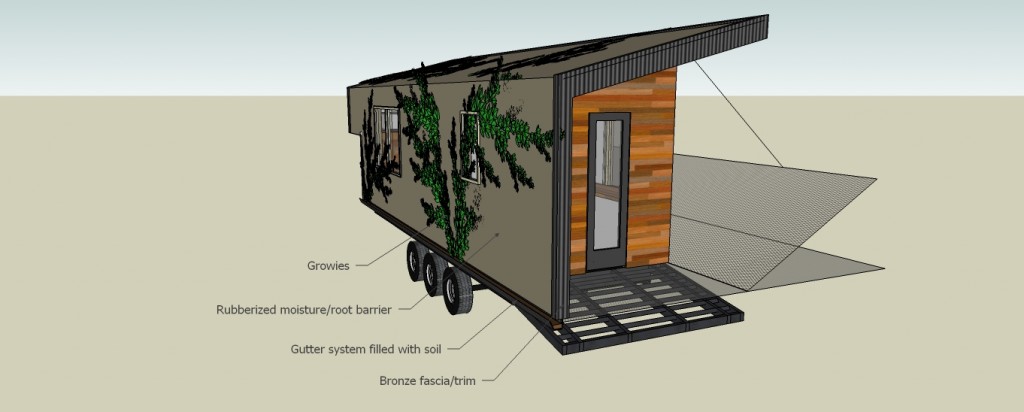
So, first thing is first, my new idea for the roof structure. I have been having a hard time thinking of some material that will feel monolithic and have a ‘mass’ to it without too many seams and or joints. With whatever system I go/went with I was planning on putting a TPO (plastic membrane) material over the roof to weatherproof it then throw whatever skin material on. I got to thinking, why? It is just for looks and that adds to the cost. Everything else in here serves at least one purpose, even the other siding material is at least recycled (I am back on the idea of using recycled pallet wood outside). It seemed way excess. SO, my solution, TPO the exterior (or otherwise seal it) add a root barrier/protection (if not a dual-purpose material), combine that with some sort of creative/decorative lattice system to act as the pretty exterior while also allowing a surface for growies. Along the bottom edge of the trailer I am thinking I could use a typical gutter system, fill it will an inch or two of soil, steal some ivy cuttings from the yard at work (it grows like a weed if it’s allowed to here), plant them and watch it climb the wall. Eventually this will create a really light weight ‘green roof’. It won’t have the same insulation properties as a green roof because there is a very small amount of soil but the leaves from the ivy WILL act as portable shade for the structure in the hot summer, the weight will be minimal and it WILL look awesome :). Yet another idea I am kicking around to use solo or in combination with the ivy is to build small garden boxes which can hang off of the trellis system and actually grow my garden (I grow in pots already) on the side of my tiny house. I am considering the options… Here is a crappy rendering.

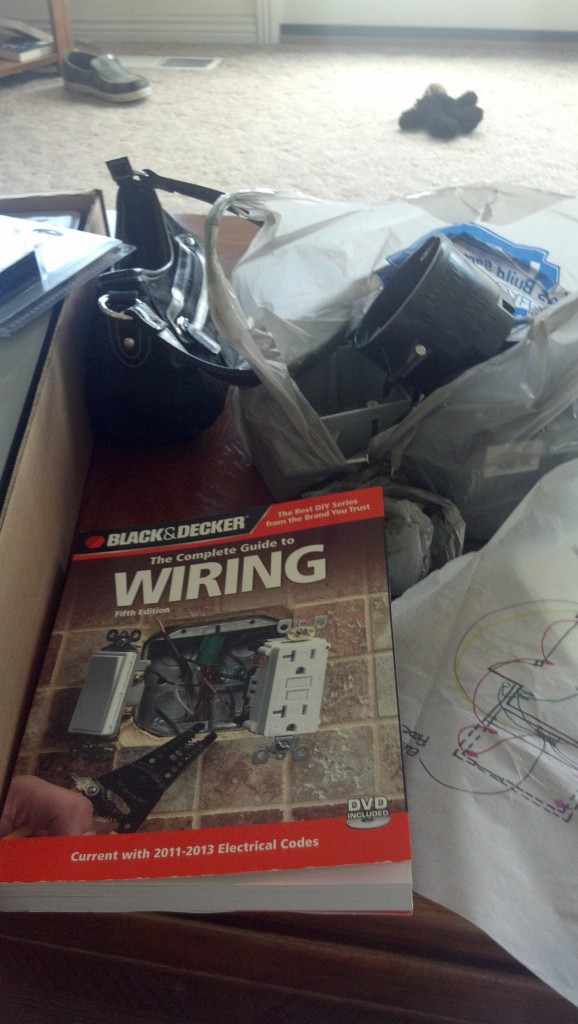
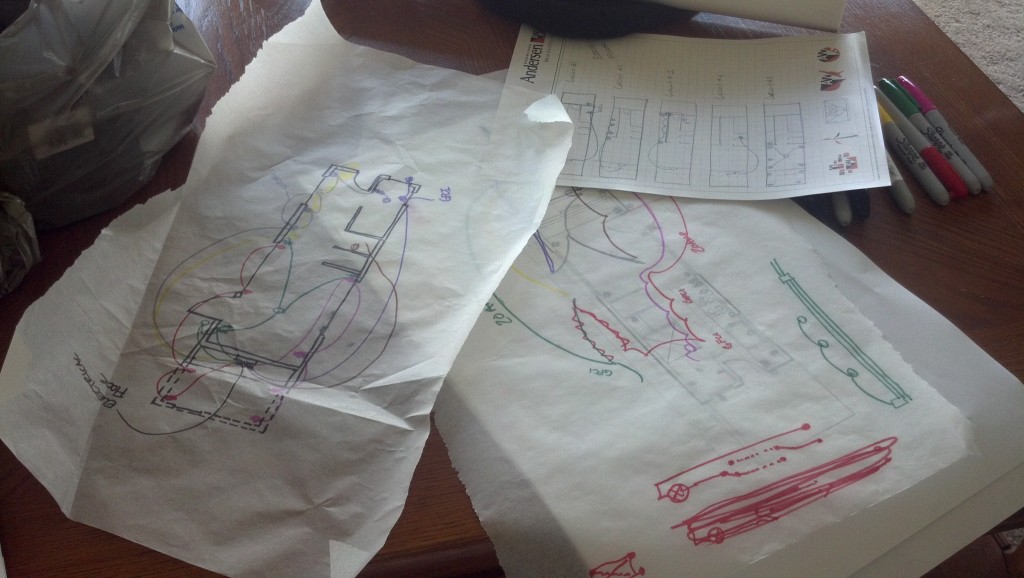
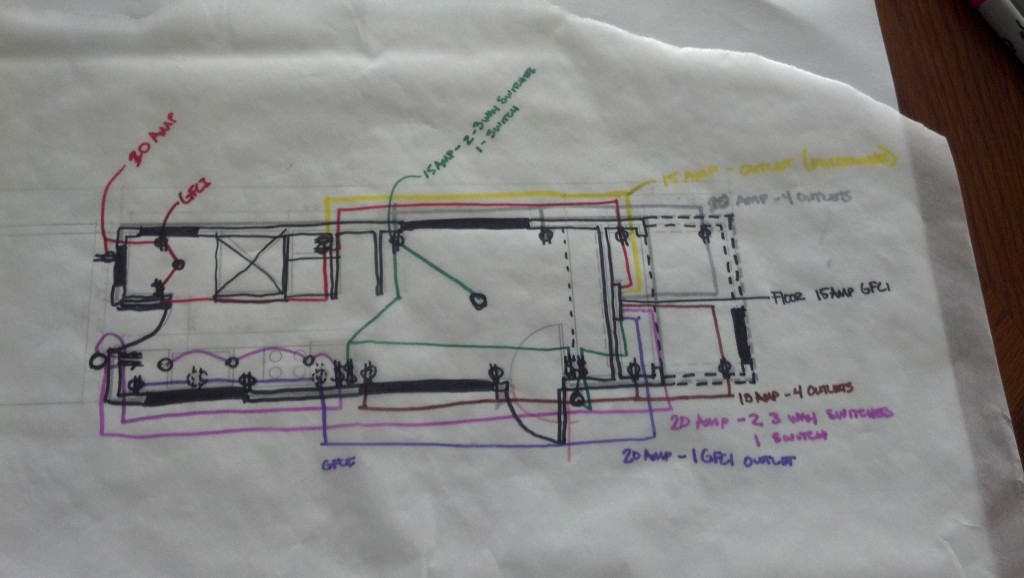
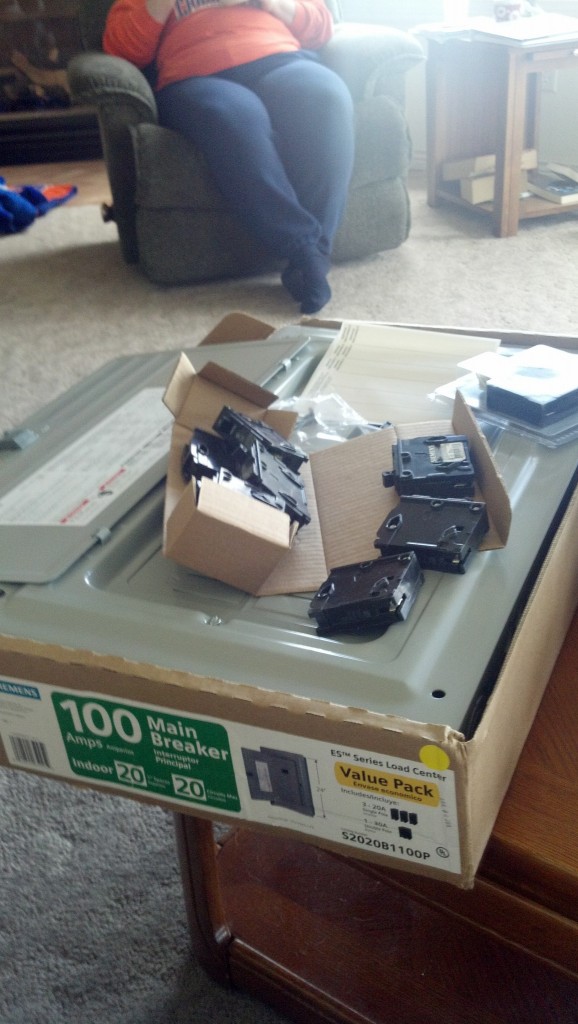
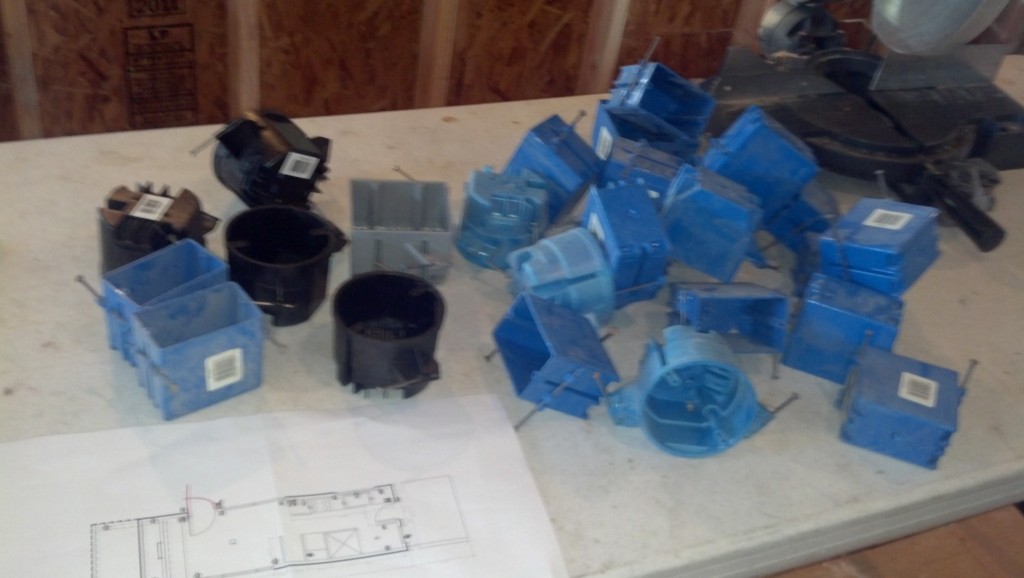
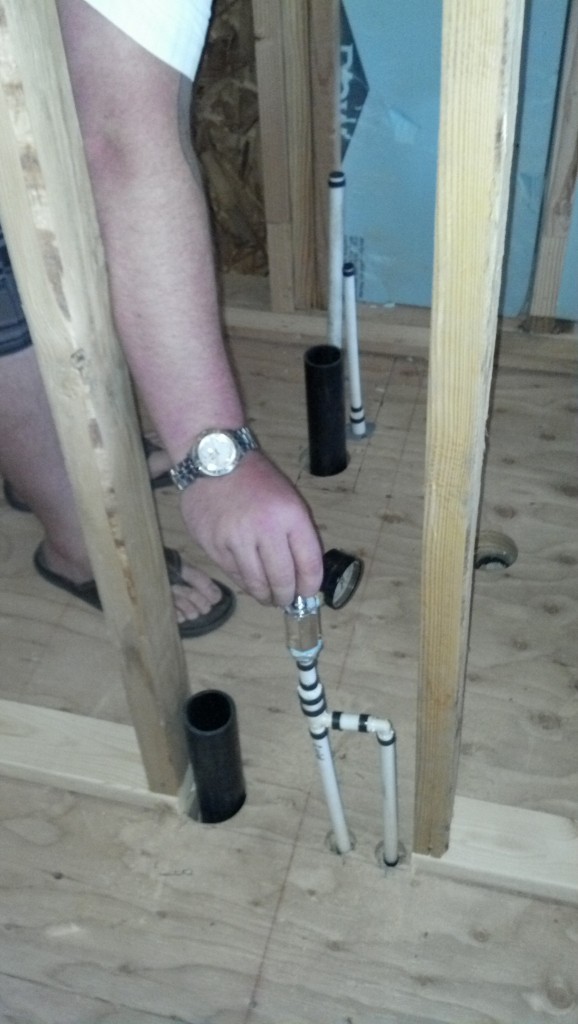
Ok, into the update an the actual progress completed. It was a lot of electrical exploring this weekend, the good news is I understand things SO much better and I am no longer scared to play with electricity, the less than good news is I am still confused as hell about some things regarding the wiring, but that is what the diagrams are for, I will work it out :). I got all the receptacles located and hung.
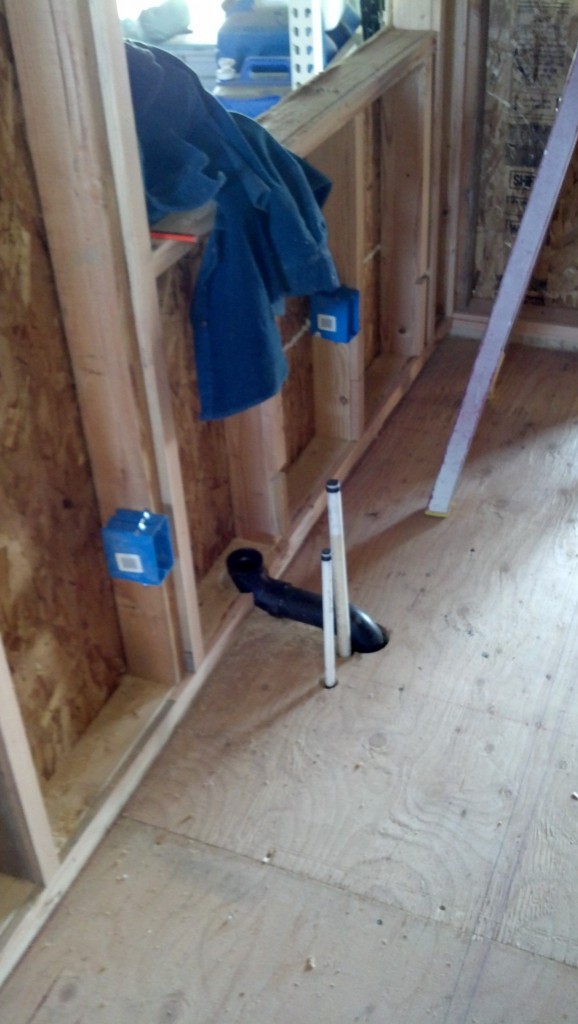
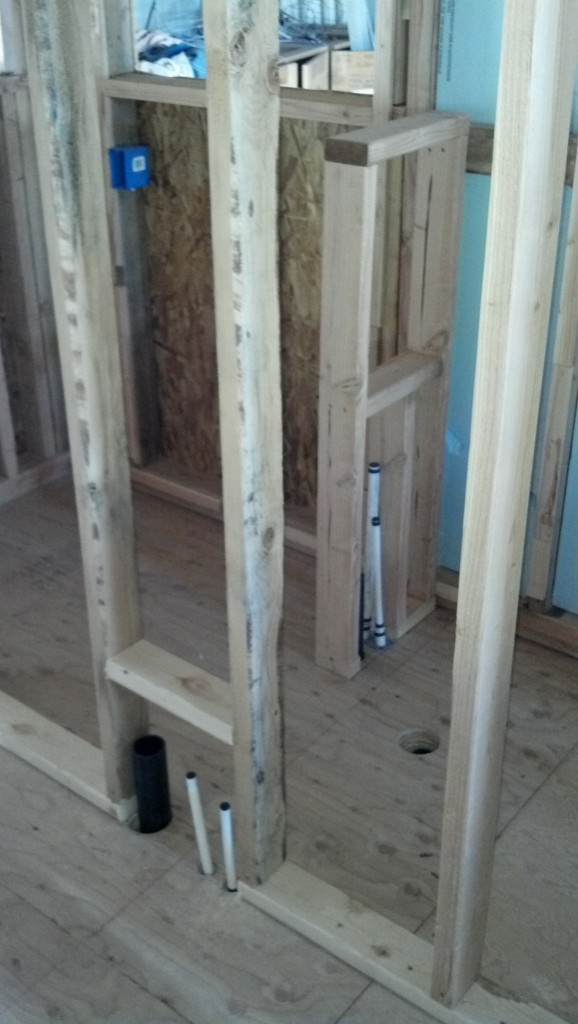
Dad got the plumbing up out of the floor. Exciting!
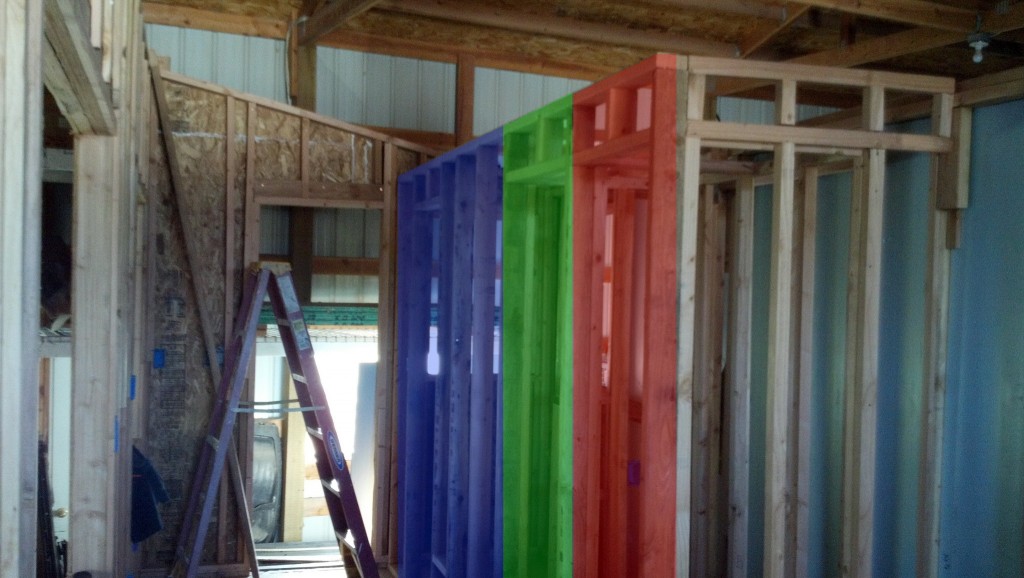
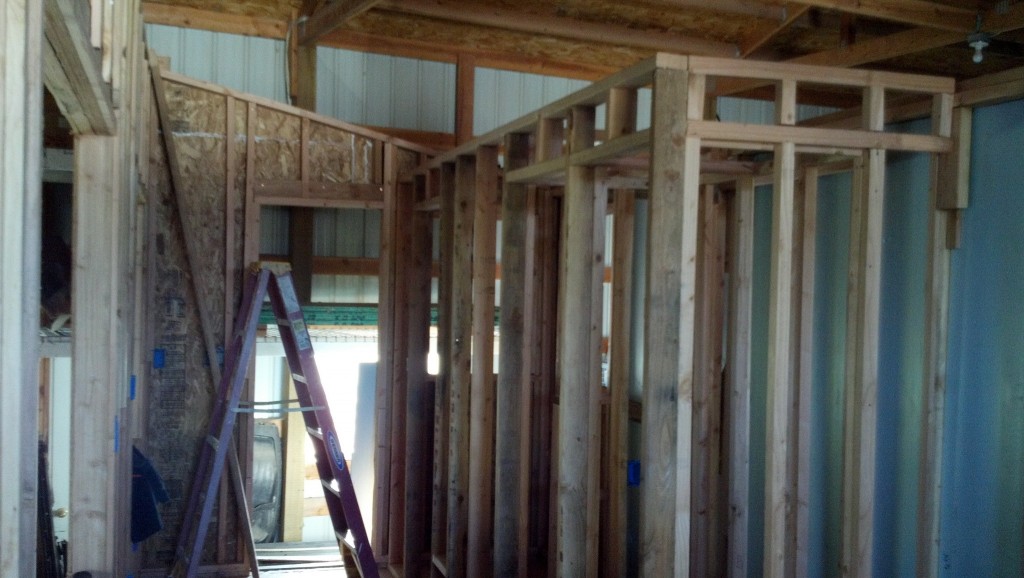
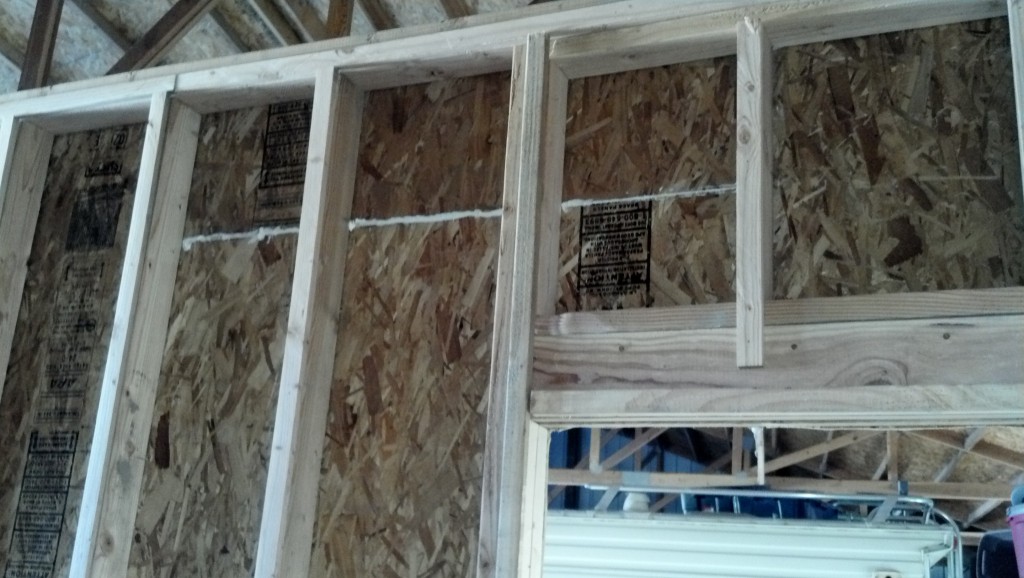
We finished the framing, including all of the interior walls! It looks awesome, pretty much meets or exceeds all of my visuals ideals in my head. We were able to find two really great storage bonuses while framing, one is a basin area above the microwave and pantry space that is sunk down about 8 inches, giving me about 16″ clear space on a square about 3 foot by 4 foot. I am planning to put all of my holiday items and chocolate making supplies up there, maybe more. The other is a space about 1 foot wide, 4 feet deep and 7 feet tall behind these two spaces. This we have lovingly deemed my ‘safe room’ because it will be a hidden area. If someone is trying to break into my house I could totally hide in it and they would never know! (As if that happens in Idaho 🙂 This space will be dedicated to any larger items I may have, say if I pick up skiing or snowboarding again, maybe some fly-fishing… all things I can do with my new found freedom allowed to me by my tiny house/minimalistic lifestyle! Also in this space I am considering installing a water purifier/softener for my water supply. Underneath the pantry area will be a cupboard for my rock climbing/hiking/camping gear. Pretty much all my other hobbies should be able to fit in my dresser that will be built down the road a bit.
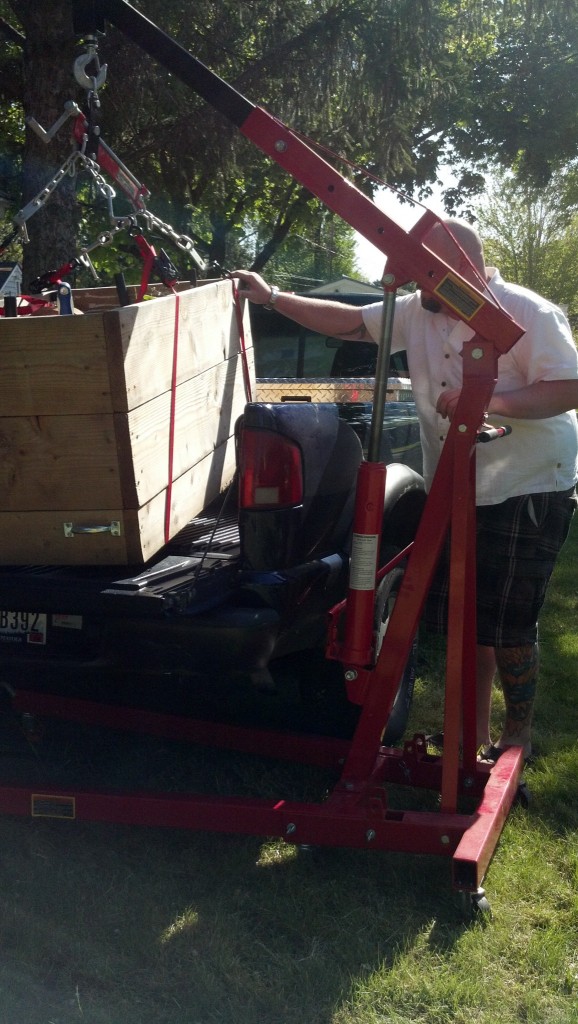
All and all a pretty productive weekend, I even got to hang out with my brothers for Cinco De Mayo AND sell some of my belongings on Craigslist. Nathan also helped me (did it for me) move my planter from my rental, that is no easy task, it’s a couple hundred pounds… (Nathan just put an offer in on a house, I hope he gets it, congratulations brother :). I hope everyone had a splendid weekend! Here are some pictures:
Coming up:
Doors (Dennis, did you volunteer to help me learn how to do this? (-: ), wrapping the exterior, installing windows, starting pallet siding, figuring out the details for a specific material for the ‘green roof’, running the wires, pulling the trailer outside to complete the roof.


Great post, and awesome progress! I say go for the roof that will provide you more insulation, rather than less. Maybe a combo as you described above?
Funny that you have that wiring book… It’s on my reading list as well! I didn’t have any hope that I could do the electrical myself.. so glad to hear you’re doing it!
Thanks Ethan! The electrical seems surprisingly simple but completely baffling at the same time, it’s weird. I bet you can do it no problems though! I just remembered, I was talking to Jonathan and he gave me a great simplified analogy for electricity, I meant to post that. I will have to add it when I get back to my home computer. It helped things make a lot of sense to me. Thanks for following still!
This Jonathan (gungy.livejournal.com) not the one below.
It’s looking more and more like a house! I’m interested to see what the roof looks like when you finally get that far. Good work!
Thanks Jonathan!
You’re welcome. I also just noticed that you sent me a facebook message and I responded. Sorry I missed it for nearly two weeks!
No worries! I figured you weren’t on there much, no hurt feelers from me ;-). Thank you VERY much for all the info!
I saw a post somewhere that mentioned that for a RV roof you could use a truck bed sealer, the black vinyl polymer coating that protects truck beds. Then you could paint it whatever color you wanted. Not sure of the R value but it would be waterproof and not dry out and crack like other sealers plus it’s lightweight. Also look for images or posts where people attach gutters to their house and grow small veggies out of them.
Good Luck!
That is a great idea, I will have an R-36 in my ceiling, in any case I won’t be getting much out of whatever waterproof layer I use and that’s ok with me. I wonder about cracking in the surface because of the area involved and the shifting associated with traveling, definitely something to look into though, I am already using that on my undercarriage, maybe I can get a bulk discount! 🙂
Thanks for following!